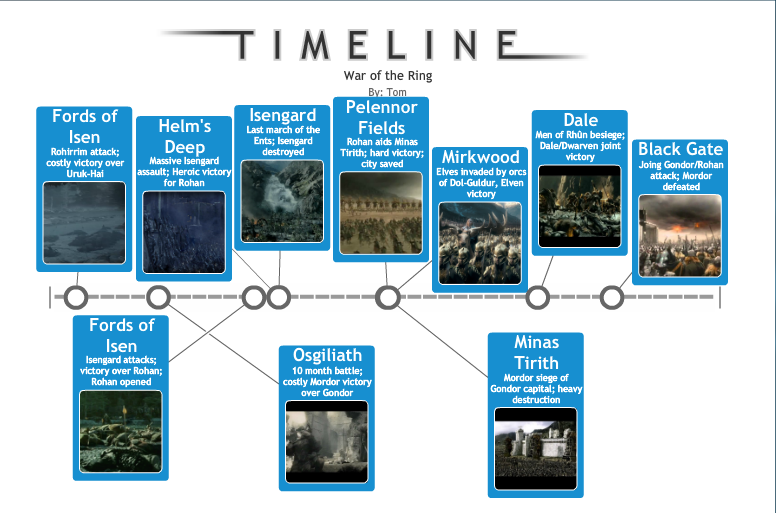
 Example of a timeline depicting the major battles of the War of the Ring, from The Lord of the Rings, chronologically.
Tool Snapshot
| Price | Free |
|---|
| Learning | Constructionism |
|---|
| Ease of Use | ★★★★✩ |
|---|
| Privacy | ★★★★★ |
|---|
| Accessibility | ★✩✩✩✩ |
|---|
| Class Size | Unlimited |
|---|
| ISTE*S | Knowledge Constructor & Creative Communicator |
|---|
Timeline Overview
Timeline requires no registration or log in, so the user is not forced to forfeit any personal information in order to use the application, which is ideal for many. However, it is not great in terms of accessibility. For example users with visual impairments would have a very difficult time operating the tool in terms of selecting their desired preferences and denoting which parts of the timeline they want to add to. Other than this drawback, the overall ease of use is commendable.
It is extremely basic and to the point, and doesn’t have any extra bells and whistles in terms of customization. This could be seen as a disadvantage, but when used in the classroom, it will encourage students to focus on the actual content rather than spending too much time on making it visually appealing. This focus on content really emphasizes Timeline’s effective use as a knowledge-centered tool.
Timeline Overview Video

 Watch on YouTube
Transcript
Timeline & the SAMR Model
- Substitution: Students use the tool to create a virtual timeline chronologically displaying a historical time period, geographical development, stages of organism growth, or the important events in a literary work rather than doing the same simply on paper.
- Augmentation: Students create interactive, multimodal timelines featuring images, text, and hyperlinks.
- Modification: Students can easily share their multimodal timelines with others through email and social media.
- Redefinition: Given the limited nature of the tool, it does not sufficiently support redefinition.
Learning Activities
Biology
- Illustrate the different stages of growth that a particular plant species cycles through.
- Depict the different stages of an certain animal’s life from birth to death.
- Illustrate the different stages of cell growth.
History
- Illustrate the evolution of humankind that led up to the homo sapiens of today.
- Narrate the key events of an important historical figure’s life.
- Illustrate the progression of related events leading up to and/or occurring during a war or governmental change.
Geography
- Depict the formation of the earth’s surface as we know it today, beginning from Pangea.
Literature
- Summarize and order a work’s key events (maybe one with more than one main characters or a plot that jumps back and forth in time so as to make the chronology of the events clearer)
- Illustrate the changes of a certain character and the events that contribute to these changes as a plot progresses
Resources
How to Use Timeline
- Go to Timeline.
- Enter your name and the project title.
- Click “Start”.
- To add to the timeline, simply click the place on the line that you wish to add an event to.
- Create a header label such as a specific date or major event and a short description if you want to. You also have the option of uploading an image to go with it. You can drag the text box and point on the timeline to wherever you want it.
- Repeat steps 4 and 5 for as many items as you would like your timeline to have.
- Once you are done, hit “Finish”. You can look over your finished project and save it if you wish. You also have the option to print or email the project.
Research
Figueiredo, M. P., Alves, V., Lourenço, C., Alves, V., Bernardo, M., & Carapito, N. (2021). Project-based learning in design and multimedia in higher education: An interactive timeline developed in collaboration.
Ivanova, A. (2021, June). Online interactive timeline to improve learning of history in school education. In International Conference on Computer Systems and Technologies' 21 (pp. 218-223).
Nutt, N., Salmistu, S., Meitl, C., & Karu, K. (2020, September). Case Study in Experiential Learning-From Chaos to Order: Sensemaking with the Interactive Timeline Tool in Architecture and Civil Engineering Studies. In International Conference on Interactive Collaborative Learning (pp. 91-102). Springer, Cham.